

Introduction
CCTV cameras play a crucial role in modern security systems, providing continuous surveillance and monitoring. However, for these cameras to function optimally, they need a stable and reliable network connection. One of the key aspects of ensuring this reliability is assigning a static IP address to each camera. Without a fixed IP address, accessing the camera remotely or integrating it with other security systems can become challenging. Understanding why a CCTV camera needs a static IP and the benefits it offers over a dynamic IP can help in making informed decisions for an efficient surveillance setup.
For a wide selection of CCTV cameras and accessories, visit this collection of CCTV supplies.
Why Does a CCTV Camera Need a Static IP?
A CCTV camera needs a static IP address primarily for stability and ease of access. A static IP remains constant, allowing seamless remote viewing and management. When a camera has a dynamic IP, its address changes periodically, making it difficult to maintain a stable connection. This can disrupt surveillance operations, especially for users who rely on remote access. A static IP ensures that the camera is always reachable, making it easier to configure security settings, integrate with monitoring software, and set up port forwarding for remote access. Additionally, security features such as firewall rules and access controls work more effectively with a fixed IP, reducing the risk of unauthorized access.
To find reliable CCTV solutions, visit Buy Security Cameras.
Benefits of Using a Static IP Over a Dynamic One
Using a static IP for a CCTV camera provides several advantages compared to a dynamic IP. One of the biggest benefits is reliability—since the IP address doesn’t change, there are no connectivity disruptions. This is particularly important for businesses and homeowners who need uninterrupted access to their security footage. Another advantage is simplified network management; devices can always communicate with the camera without needing reconfiguration. Additionally, a static IP enhances security by allowing administrators to set up strict access rules, reducing potential vulnerabilities. Lastly, it simplifies remote access by making it easier to configure routers and ensure smooth connectivity without constantly updating IP settings.
By understanding these factors, users can make well-informed choices about setting up their CCTV cameras with a static IP, ensuring efficiency, security, and uninterrupted surveillance.
Recommended products
-
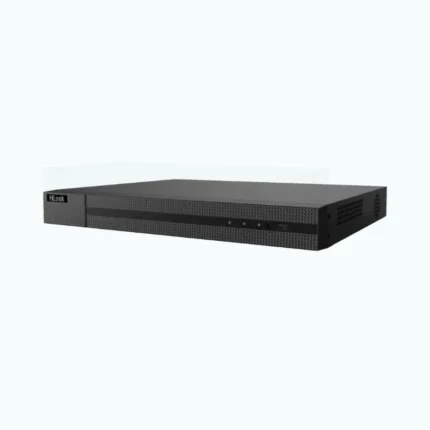
HiLook 16 Channel PoE Network Video Recorder NVR-216MH-C/16P with 4TB HDD
Original price was: $850.00.$760.00Current price is: $760.00. -
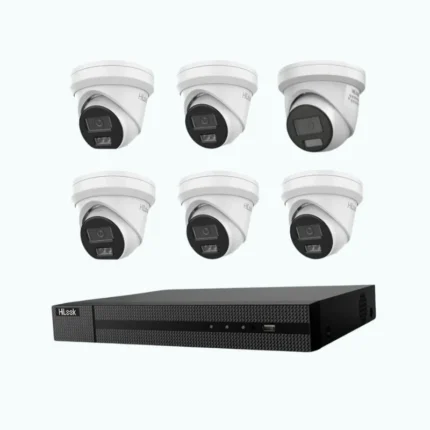
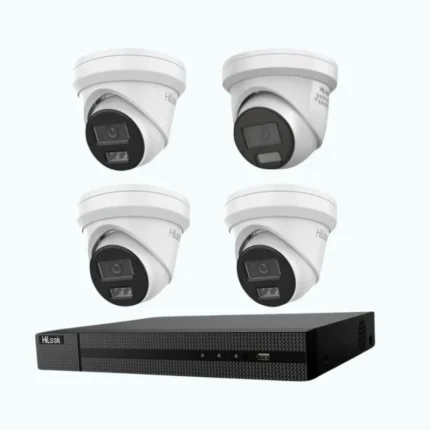
HiLook 3 x 6MP IntelliSense AI + 1 HiLook ACDC Camera Kit with 4Channel NVR +2TB HDD
Original price was: $950.00.$780.00Current price is: $780.00. -
HiLook 4 Channel PoE Network Video Recorder NVR-104MH-C/4P
Original price was: $280.00.$220.00Current price is: $220.00. -
HiLook 5 x 6MP IntelliSense AI + 1 HiLook ACDC Camera Kit with 8Channel NVR +2TB HDD

Understanding Static IP vs. Dynamic IP
When setting up a network, especially for devices like CCTV cameras, understanding the difference between static and dynamic IP addresses is crucial. Each type of IP address serves a different purpose, and knowing when to use one over the other can help optimize connectivity, security, and remote access.
What is an IP Address?
An IP (Internet Protocol) address is a unique identifier assigned to each device connected to a network. It functions like a digital address, allowing devices to communicate with each other over the internet or a local network. Just as a home address helps the postal service deliver mail to the correct location, an IP address ensures that data reaches the right device. Every time a device connects to a network, it receives an IP address, which enables seamless online interactions.
How a Static IP Differs from a Dynamic IP
A static IP address is a fixed, unchanging address manually assigned to a device, ensuring that it remains constant over time. This means the device always has the same IP address, making it easier to locate and connect remotely.
On the other hand, a dynamic IP address is automatically assigned by a network’s DHCP (Dynamic Host Configuration Protocol) server and changes periodically. Internet service providers (ISPs) commonly use dynamic IPs to manage network resources efficiently. While dynamic IPs are more cost-effective and require less management, static IPs offer greater reliability and stability for devices that need consistent access.
When Should You Use a Static IP for Your CCTV System?
For CCTV systems, using a static IP address is often recommended, especially if remote access is a priority. A static IP ensures that the surveillance system can be accessed consistently from any location without worrying about IP changes. This is particularly useful for businesses and homeowners who need to monitor security footage remotely.
Moreover, a static IP enhances security by allowing controlled access, reducing the risk of unauthorized connections. It also simplifies network management, making it easier to configure routers and firewalls for optimal protection. When reliability, security, and ease of access are critical, a static IP is the preferred choice for CCTV systems.
Preparing for Configuration
Setting up a static IP address for your CCTV camera starts with proper preparation. Before making any changes, it’s crucial to check your network settings, gather the necessary details, and log into the camera’s admin panel. Each of these steps ensures a smooth configuration process, preventing connection issues and ensuring stable access to your camera.
Checking Your Network Settings
Before assigning a static IP, you need to understand your current network setup. Your router manages all connected devices, assigning them IP addresses dynamically. To configure a static IP, you must first access your router’s settings and verify key details. This step helps you determine the available IP range and ensures the IP address you choose doesn’t conflict with other devices.
Gathering Necessary Details: IP Range, Gateway, and Subnet Mask
A static IP must fit within your network’s IP range while avoiding conflicts with other devices. To do this, you need three essential pieces of information: the IP range, the default gateway, and the subnet mask. The IP range defines which addresses are available, the gateway is the main access point (usually your router’s IP), and the subnet mask determines which addresses can communicate within the network. Having these details ready will simplify the configuration process.
Logging into Your Camera’s Admin Panel
Once you have all the necessary network details, the next step is accessing your CCTV camera’s admin panel. This is where you can manually enter the static IP address and apply the network settings. To log in, you typically enter the camera’s current IP address into a web browser and use the default username and password. Once inside, you can navigate to the network settings and configure the static IP, ensuring your camera remains easily accessible on the network.
Assigning a Static IP to Your CCTV Camera
Assigning a static IP to your CCTV camera ensures a stable and reliable connection, allowing you to access your camera without worrying about IP changes. A static IP prevents conflicts and makes remote monitoring seamless. To set up a static IP, you need to access your camera’s network settings, choose an appropriate IP address within your network’s range, and configure the default gateway and DNS settings.
Accessing the Camera’s Network Settings
The first step in assigning a static IP is accessing your CCTV camera’s network settings. To do this, connect your computer to the same network as the camera. Open a web browser and enter the camera’s current IP address in the address bar. This will bring up the login page, where you’ll need to enter the administrator credentials. Once logged in, navigate to the network settings section, where you can modify the IP configuration.
Choosing the Right IP Address Within Your Network Range
Selecting the correct IP address is crucial to avoid conflicts with other devices on your network. Your network follows a specific IP range, typically based on your router’s settings. For example, if your router’s IP is 192.168.1.1, the available range is usually between 192.168.1.2 and 192.168.1.254. Choose an unused IP address within this range to ensure smooth operation. Keeping a record of the assigned IP address can prevent connection issues in the future.
Configuring the Default Gateway and DNS Settings
Once you’ve assigned a static IP, you need to configure the default gateway and DNS settings for proper network communication. The default gateway is usually your router’s IP address, which acts as the main access point for devices on your network. The DNS settings help translate domain names into IP addresses, ensuring a stable connection. You can use your router’s IP or a public DNS, like Google’s 8.8.8.8. Configuring these settings correctly ensures that your CCTV camera remains accessible and functions properly.
By following these steps, you can assign a static IP to your CCTV camera, ensuring a stable and secure connection for monitoring and surveillance.
What is Port Forwarding, and Why is it Important?
Port forwarding is a technique that allows devices outside a private network to access specific services or devices within it. It works by directing incoming traffic from the internet to a designated device inside the network, such as a security camera, web server, or gaming console. This setup is crucial for remote access because it enables users to connect to their home or office network from anywhere. Without port forwarding, external devices wouldn’t be able to find or communicate with internal services effectively. For example, if you need to view your CCTV cameras remotely, port forwarding ensures that the video feed reaches your phone or computer securely. It helps businesses and individuals maintain connectivity while also enhancing security when configured correctly.
How to Configure Port Forwarding on Your Router
Setting up port forwarding requires accessing your router’s settings and creating rules that tell the router where to send incoming traffic. The first step is to log into the router’s admin panel, usually done by entering the router’s IP address into a web browser. Once inside, you need to navigate to the port forwarding section, which may be labeled differently depending on the router model. Here, you will define specific rules by entering details like the internal device’s IP address, the service’s port number, and the protocol (TCP, UDP, or both). Assigning a static IP address to the target device is essential to ensure a stable connection. After entering the necessary details, saving and applying the changes activates port forwarding. Some routers may require a restart for the settings to take effect. Proper configuration ensures that external requests are directed precisely to the intended device without interference.
Testing Remote Access to Ensure Proper Setup
After configuring port forwarding, it’s essential to verify that it’s working correctly. The first step is to check your public IP address, which is the unique identifier assigned to your internet connection by your service provider. Testing should be done from an external network, such as using mobile data or a different Wi-Fi connection. By entering the public IP address followed by the assigned port number, you can check if the service is accessible remotely. If the connection fails, troubleshooting steps include verifying that the port forwarding settings are correct, ensuring that the firewall isn’t blocking traffic, and confirming that the target device is powered on and running the necessary service. A successful test confirms that your network is properly configured for remote access, providing seamless connectivity to your devices from anywhere.
Troubleshooting Common Issues
Security cameras play a crucial role in safeguarding properties, but technical issues can sometimes disrupt their functionality. Understanding common problems and how to resolve them ensures a smooth surveillance experience. Here’s a detailed explanation of common CCTV issues and their solutions.
Camera Not Connecting to the Network
One of the most frustrating issues users face is a camera failing to connect to the network. This problem can arise due to incorrect network settings, poor cable connections, or insufficient power supply. To fix this, it’s essential to check whether the camera is powered on and properly connected to the router or switch. Additionally, verifying network configurations, such as IP addresses and subnet settings, can help resolve connectivity problems. Restarting the camera or router may also refresh the connection and restore functionality.
IP Conflict Issues and How to Resolve Them
IP conflicts occur when two devices on the same network are assigned the same IP address, leading to communication failures. This can prevent the CCTV camera from functioning correctly. To resolve this, users should ensure each device has a unique IP address. Manually assigning a static IP to the camera instead of relying on dynamic IP allocation can help avoid such conflicts. Checking the router’s DHCP settings and adjusting them accordingly can also contribute to a more stable network environment.
Checking Firewall and Security Settings
Firewalls and security settings are designed to protect the network but may unintentionally block the CCTV camera’s access. Some security configurations restrict unknown devices, which can prevent cameras from connecting. To address this, users should check their firewall settings and whitelist the camera’s IP address if necessary. Ensuring that the required ports are open and that antivirus software isn’t interfering with the connection can also improve accessibility.
By understanding these common CCTV camera issues and their solutions, users can troubleshoot problems effectively and maintain a reliable surveillance system. Regular monitoring and proper configuration help prevent future disruptions and ensure seamless security operations.
Final Testing & Security Measures
Ensuring the effectiveness and security of your CCTV system is a crucial final step after installation. This phase involves verifying that all cameras are properly connected, enhancing security through strong authentication measures, and maintaining the system regularly to ensure long-term stability. Skipping these steps can lead to connectivity failures, security breaches, or poor system performance. Taking the time to complete these checks will provide peace of mind and ensure your surveillance setup functions as intended.
Verifying Connectivity with Your CCTV Software
Once your CCTV system is installed, the next step is to confirm that all cameras are communicating correctly with your software. This means checking the live feed to ensure each camera is transmitting clear and uninterrupted footage. If any cameras fail to appear or show disruptions, troubleshooting the network, rechecking IP configurations, or adjusting settings may be necessary. Additionally, testing remote access is crucial if you plan to monitor your cameras from a mobile device or another location. A properly configured system should allow smooth access without delays or connection failures.
Enhancing Security with Strong Passwords
A CCTV system is only as secure as its access credentials. Many people overlook password security, leaving their systems vulnerable to unauthorized access. Using default or weak passwords makes it easy for hackers to take control of your cameras. To enhance security, it is essential to create strong, unique passwords that combine uppercase and lowercase letters, numbers, and special characters. Changing passwords regularly and enabling two-factor authentication (2FA) can provide an additional layer of protection. Keeping login credentials confidential and limiting access to authorized personnel will further safeguard your surveillance system.
Regular Maintenance Tips for a Stable Network
Like any electronic device, CCTV systems require regular maintenance to function efficiently over time. Dust, weather conditions, and physical damage can affect camera performance, making routine inspections necessary. Cleaning camera lenses ensures a clear video feed, while checking wiring and connections helps prevent signal interruptions. Additionally, monitoring storage capacity is essential to avoid losing important recordings due to full memory. Updating firmware and software regularly ensures that your system remains secure against cyber threats and benefits from the latest technological improvements. A well-maintained CCTV system will continue to provide reliable security without unexpected failures.
Conclusion
In conclusion, configuring a static IP address for your CCTV camera is a vital step in ensuring consistent and reliable surveillance. By assigning a fixed IP, you guarantee uninterrupted access to your camera’s feed, facilitating seamless remote monitoring and management. This stability not only enhances the security of your premises but also simplifies network management by eliminating potential IP conflicts. Embracing this practice empowers you to maintain a robust and efficient surveillance system, providing peace of mind and heightened protection for your property.
FAQs
- How to configure a static IP in a CCTV camera?
To configure a static IP in a CCTV camera, access the camera’s settings through a web browser or software, navigate to the network settings, disable DHCP, and manually enter the desired IP address, subnet mask, gateway, and DNS. Save the settings and restart the camera to apply changes. - Do CCTV cameras need a static IP?
It depends on the setup. A static IP is beneficial for remote access, as it ensures the camera is always reachable at the same address. However, for local network use, dynamic IPs assigned by the router (via DHCP) can also work. - How to configure static IPs?
To configure a static IP, log into the device’s network settings, disable automatic (DHCP) assignment, and manually input an IP address within the router’s range. Set the subnet mask, gateway, and DNS as per the network configuration, then save and restart the device to apply changes.