

")
How Wireless CCTV Cameras Work with NVRs
Wireless CCTV cameras have transformed modern surveillance by eliminating the need for extensive wiring, making them a convenient and flexible security solution. When paired with a Network Video Recorder (NVR), these cameras create an efficient monitoring system that captures, stores, and manages footage seamlessly.
Understanding how wireless CCTV cameras work with NVRs is essential for setting up a reliable security system. While wireless cameras transmit video data over Wi-Fi, NVRs serve as the central hub that records and organizes this footage. The integration of these two technologies ensures a smooth and effective surveillance setup, ideal for both residential and commercial spaces.
In this guide, we’ll explore how wireless CCTV cameras operate, the role of NVRs, and how they work together to provide a secure and scalable monitoring system.
Understanding Wireless CCTV and NVR Compatibility
When setting up a wireless surveillance system, it’s important to understand that not all wireless CCTV cameras and Network Video Recorders (NVRs) are automatically compatible. Many users assume that any camera will work with any NVR, but that’s not always the case. Compatibility depends on several factors, including the brand, communication protocols, resolution support, and wireless connectivity. Making the right choice ensures a smooth and efficient security setup.
One of the most important factors to check is whether both the camera and the NVR are from the same brand. Manufacturers design their products to work seamlessly within their own ecosystem, which minimizes connectivity issues. However, if you need to mix different brands, it’s essential to verify if both devices support the ONVIF protocol. ONVIF is an industry-standard that allows security devices from different manufacturers to communicate with each other. Even if the camera and NVR support ONVIF, some advanced features like motion detection or AI analytics may not work perfectly. Always check the compatibility list provided by the manufacturer before making a purchase.
Related Products
Another key consideration is resolution compatibility. CCTV cameras come in different resolutions, such as 1080p, 2K, and 4K. However, if your NVR only supports up to 1080p and you connect a 4K camera, the system will not display the higher resolution, reducing the quality of your surveillance footage. To get the best results, ensure that your NVR can handle the resolution of the camera you plan to use. Matching the resolution capabilities of both devices will help you maximize video clarity and storage efficiency. For reliable performance and seamless integration, you can also get high-performance Dahua NVR solutions to ensure your system operates at its full potential.
Wireless connectivity is another crucial factor. Just because a camera is wireless doesn’t necessarily mean it will work with any NVR. Some NVRs have built-in Wi-Fi, allowing them to connect to wireless cameras directly, while others require a separate network or access point. If the NVR lacks built-in Wi-Fi support, you may need additional equipment to establish a stable connection. Before purchasing a system, verify that the NVR can communicate with wireless cameras without complicated setup issues.
By understanding these compatibility factors, you can avoid connectivity problems and build a surveillance system that works smoothly. Always check brand compatibility, ONVIF support, resolution matching, and wireless connectivity to ensure a hassle-free experience. For more details and product options, visit Buy Security Cameras.

What You Need Before Setup
Before setting up your wireless CCTV camera with an NVR, it’s important to gather all the necessary devices and accessories. Having everything ready ensures a smooth installation and prevents unnecessary delays.
Wireless CCTV Camera
A wireless CCTV camera is the core of your surveillance system. Unlike traditional wired cameras, it transmits video over Wi-Fi, reducing the need for excessive cabling. Ensure the camera is compatible with your NVR for seamless connectivity and performance.
NVR with Wireless Support
A Network Video Recorder (NVR) is responsible for receiving, storing, and managing video footage from your cameras. Not all NVRs support wireless connections, so it’s essential to use one specifically designed for wireless surveillance. This allows your cameras to communicate with the NVR without requiring physical network cables.
Related Products
-

12V 2A Power Adapter AC 100-240V to DC Travel Adapter
$21.00 -
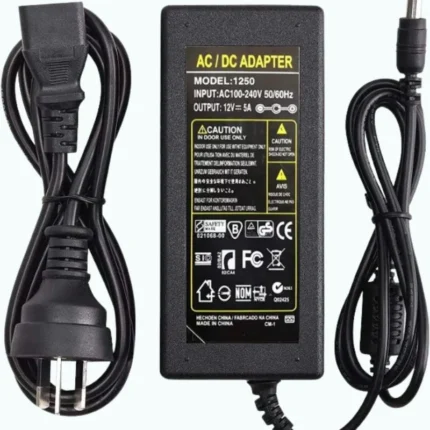
12V 5A Power Supply AC Adapter 60W
$32.00 -
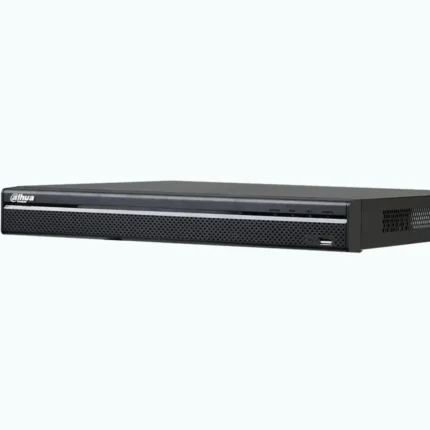
16 Channel NVR DHI-NVR5216-16P-4KS2E – 4K H.265+ Pro Series
$690.00 -
16 Port PoE Switch DH-PFS4218-16ET-190 100Mbps
$420.00 -
1TB Surveillance Hard Drive 3.5″ SATA3
-
2TB Surveillance Hard Drive 3.5″ SATA
-
4 Port POE With 4FE + 2FE Uplink Ports 250M Long Range PoE Switch WI-PS205H
Original price was: $80.00.$60.00Current price is: $60.00. -

8 Channel Dahua DHI-NVR4108HS-8P-AI/ANZ 8PoE Up to 16MP Wizsense Network Video Recorder
$299.00
Stable Wi-Fi Connection
A strong and stable Wi-Fi connection is crucial for a wireless CCTV system. A poor or unstable network can lead to lagging video, connection drops, or missing footage. Make sure your router has enough bandwidth to handle the camera feeds without interruptions. Positioning the router closer to the cameras or using Wi-Fi extenders can help improve connectivity.
Monitor or Smartphone for Viewing
To watch live footage or review recorded videos, you need a monitor or a smartphone. A monitor connects directly to the NVR, allowing you to manage and view recordings on a larger screen. Alternatively, a smartphone with the appropriate app lets you access your security system remotely, providing real-time monitoring from anywhere.
Power Adapter for the Camera and NVR
Both the wireless CCTV camera and the NVR require power to function. Even though the camera transmits video wirelessly, it still needs a power source. Use the designated power adapters to ensure a stable power supply, preventing interruptions in recording and monitoring.
Ethernet Cable (for Initial Setup if Needed)
Although the system operates wirelessly, an Ethernet cable may be necessary during the initial setup. Connecting the NVR and cameras to the router via a cable helps establish a stable connection for configuring settings. Once the setup is complete, you can disconnect the cable and switch to a fully wireless operation.
Powering On the Camera and NVR
To begin setting up your wireless CCTV camera, the first step is to ensure that the camera is properly powered. Plug the camera into a reliable power source using the provided adapter. It is important to check that the connection is secure and that the camera receives a steady power supply to function correctly. Without power, the camera cannot transmit video or connect to the NVR.
Once the camera is powered on, the next step is to turn on the Network Video Recorder (NVR). The NVR acts as the central hub for managing and storing video footage from the camera. After switching it on, connect the NVR to a monitor using an HDMI or VGA cable. This connection allows you to view live footage and adjust settings directly from the monitor. A clear display is crucial for confirming that the camera and NVR are communicating properly.
In some cases, the NVR may require an initial wired connection to the internet before it can operate wirelessly. If this is necessary, use an Ethernet cable to connect the NVR to your router. This step enables the NVR to establish a stable network connection, allowing it to detect and pair with the wireless camera. Once the initial setup is complete, the NVR can operate wirelessly, depending on the system’s capabilities.
By carefully following these steps, you ensure that both the camera and NVR are set up correctly, laying the foundation for a secure and efficient surveillance system.

Connecting the Camera to Wi-Fi
Access the Camera via Its Mobile App or Web Interface
To connect your wireless CCTV camera to Wi-Fi, start by accessing it through its mobile app or web interface. Most modern cameras come with an official app provided by the manufacturer, which you can download from the app store. If you prefer using a web browser, find the camera’s IP address (usually available in the manual or on the camera itself) and enter it in the browser. Once you reach the login page, enter the credentials provided by the manufacturer. This step is crucial as it allows you to configure the camera and make necessary adjustments before connecting it to the network.
Enter Wi-Fi Credentials to Connect It to the Network
After gaining access to the camera’s interface, navigate to the network settings. You will find an option to connect the device to a Wi-Fi network. Click on this option, select your home or office Wi-Fi from the list of available networks, and enter the correct password. Double-check the credentials before confirming to avoid connection issues. Once the details are saved, the camera will attempt to establish a connection. This step ensures that your camera becomes a part of your network, allowing for remote access and live streaming.
Ensure the Signal Is Strong for Uninterrupted Streaming
A weak Wi-Fi signal can cause disruptions in video streaming or disconnect the camera altogether. To ensure a stable connection, place the camera in a location with a strong signal. Avoid placing it behind thick walls, metal objects, or electronic devices that could interfere with the signal. If the connection remains unstable, consider using a Wi-Fi extender or relocating the router for better coverage. A strong signal ensures continuous monitoring, so you don’t miss any crucial footage.
Reboot the Camera If It Fails to Connect
Sometimes, even after entering the correct Wi-Fi credentials, the camera may fail to connect. In such cases, a simple reboot can resolve the issue. Turn the camera off, wait a few seconds, and then power it back on. After rebooting, try reconnecting it to Wi-Fi by following the previous steps. If the problem persists, resetting the camera to factory settings and starting over might help. A reboot often resolves minor connectivity glitches and ensures the camera functions correctly.
Adding the Wireless Camera to the NVR
To connect a wireless camera to your NVR, start by opening the NVR menu and navigating to the Camera Management section. This is where you can manage all connected cameras and add new ones. The interface may vary depending on the brand, but most NVR systems have a dedicated menu for camera configuration.
Next, select the “Add Camera” option. To make the process easier, choose the Auto-Search feature. This allows the NVR to scan for available wireless cameras within its network range. If the system detects the camera, you can proceed with adding it. However, sometimes the camera may not appear in the search results due to network issues or incorrect settings.
If the camera isn’t automatically detected, you can manually add it by entering its IP address. To find the correct IP address, you may need to check the camera’s settings or use your router’s connected devices list. Input the IP address carefully to ensure a successful connection.
Once the camera is selected, you will need to enter the login credentials—typically a username and password. These credentials ensure secure access and prevent unauthorized modifications. After entering the details, save the settings. The NVR should then establish a connection with the wireless camera, allowing you to view and manage the live feed.
Following these steps ensures a seamless integration of your wireless CCTV camera with the NVR, improving your surveillance system’s efficiency.
Configuring Video Settings for Best Performance
Properly configuring your CCTV camera’s video settings ensures clear and smooth video playback while optimizing storage and security monitoring. Adjusting key settings like resolution, frame rate, motion detection, night vision, and audio can significantly enhance the performance of your surveillance system.
Adjust Resolution and Frame Rate in NVR Settings
The resolution and frame rate of your CCTV camera impact the quality and smoothness of your recordings. Higher resolution provides clearer images but requires more storage, while frame rate determines how fluid the video appears. It is essential to find a balance between video quality and available storage capacity. Configuring these settings in your NVR allows you to customize the recording experience based on your specific needs.
Enable Motion Detection and Set Recording Preferences (Continuous or Motion-Based)
Motion detection helps capture relevant footage by triggering recording only when movement is detected. This feature minimizes unnecessary storage use while ensuring critical moments are recorded. Within the NVR settings, you can choose between continuous recording and motion-based recording. Continuous recording captures every moment but consumes more storage, whereas motion-based recording saves space by activating only when activity is detected.
Configure Night Vision and Audio Settings (If Supported)
Night vision plays a crucial role in maintaining visibility in low-light conditions. Many CCTV cameras include infrared (IR) technology that automatically adjusts to darkness, providing clear images even at night. Additionally, if your camera supports audio, enabling and fine-tuning sound settings can add an extra layer of security, allowing you to hear and record audio alongside video footage.
Test the Feed for Smooth Playback and Minimal Delay
Once all settings are configured, testing the live feed ensures that the video stream is smooth and free from lag. Adjusting bitrate, network settings, and camera placement can help optimize performance. Checking for any buffering or delay will help you fine-tune the setup for reliable, real-time surveillance.
By following these steps, you can configure your CCTV camera’s video settings for the best performance, ensuring clear visuals, efficient storage use, and reliable security monitoring.
Testing the Connection and Troubleshooting Issues
Setting up a wireless CCTV camera with an NVR can sometimes be tricky. Even after following the installation steps, you might run into connectivity problems. Testing the connection is a crucial step to ensure that your camera and NVR are properly linked. This involves checking the network settings, verifying power supply, and ensuring the devices communicate correctly. If issues arise, troubleshooting them promptly can save time and keep your security system functioning smoothly.
Common Issues and Fixes
Camera Not Showing on NVR
One of the most common issues users face is the camera not appearing on the NVR. This usually happens when both devices are not on the same network. The camera and NVR must be correctly configured to communicate with each other. Double-checking the network settings and ensuring they are connected to the same router can resolve this issue. If the problem persists, restarting both devices or resetting the network settings may help.
Poor Video Quality
If the video feed from your camera appears blurry, pixelated, or low quality, the issue may be related to resolution and bitrate settings. Cameras often come with adjustable settings that control video clarity. Tweaking these settings to match the NVR’s capabilities can significantly improve the footage. External factors like poor lighting or dirty camera lenses can also affect video quality, so regular maintenance is essential.
Connection Drops
Intermittent disconnections can make a security system unreliable. Weak Wi-Fi signals, interference from other electronic devices, or physical barriers like walls can cause connection drops. Placing the camera closer to the router can improve signal strength. If that is not possible, using a Wi-Fi extender or switching to a wired Ethernet connection can provide a more stable connection.
No Recording
A camera that isn’t recording can be frustrating, especially when you need footage for security purposes. This issue is often due to limited storage space in the NVR or disabled recording settings. Checking the available storage and enabling the correct recording mode can ensure continuous recording. If the NVR allows, setting up automatic overwriting of old footage can prevent storage-related disruptions.
By understanding and addressing these common issues, you can keep your wireless CCTV camera system running efficiently, ensuring a reliable security setup.
Enhancing Security and Remote Access
When setting up a wireless CCTV camera with an NVR, security and accessibility should be your top priorities. Proper security measures help prevent unauthorized access, while remote viewing allows you to monitor your property from anywhere. By following best practices, you can ensure that your surveillance system remains both safe and efficient.
Security Tips
One of the first steps in securing your CCTV system is changing the default login credentials. Cameras and NVRs often come with factory-set usernames and passwords, which are widely known and can be easily exploited. By setting a strong, unique password, you reduce the risk of unauthorized access and protect your system from potential threats.
Another crucial security measure is enabling encryption and firewall settings on your router. Encryption ensures that any data transmitted between your devices remains protected, while a firewall prevents unauthorized connections from accessing your network. These steps create an additional layer of security, safeguarding your surveillance system from cyber threats.
Keeping your firmware updated is equally important. Manufacturers release updates to fix security vulnerabilities and enhance system performance. Regularly checking for firmware updates and installing them ensures that your CCTV system remains protected against the latest threats. Ignoring these updates can leave your system exposed to security risks.
Setting Up Remote Viewing
Remote access allows you to monitor your CCTV system from anywhere using a smartphone or computer. To enable this feature, start by downloading the appropriate mobile app for your NVR. Different brands provide their own applications, such as Hik-Connect, Reolink, or Dahua DMSS, which allow you to connect and control your cameras remotely.
Once the app is installed, you will need to link your NVR to your mobile device. This is typically done by scanning a QR code on the NVR or manually entering its serial number. This step ensures a secure connection between your system and the app, allowing you to access your live footage without complicated configurations.
Enabling Peer-to-Peer (P2P) Cloud Access is the final step in setting up remote viewing. P2P technology simplifies the connection process, allowing you to access your CCTV system over the internet without the need for complex network settings. By activating this feature, you can easily monitor your security cameras in real time from anywhere, ensuring peace of mind.
By implementing these security measures and setting up remote access, you can make the most of your CCTV system, keeping your property protected and accessible at all times.
FAQs:
1. Can I Connect a Wireless Camera to an NVR?
Yes, you can connect a wireless CCTV camera to an NVR, but both devices must be compatible. Some NVRs come with built-in Wi-Fi to auto-detect and pair with wireless cameras, while others require manual configuration using the camera’s IP address. If your camera and NVR support ONVIF protocol, they can work together even if they are from different brands.
2. Can I Make My NVR Wireless?
Yes, you can make your NVR wireless by connecting it to a Wi-Fi router using a wireless adapter (if supported) or by purchasing an NVR with built-in Wi-Fi. However, most professional-grade NVRs still require a wired connection for stable performance and better data transfer speeds. If your cameras are wireless, you can keep the NVR connected to the router via Ethernet while using Wi-Fi for the cameras.
3. Are NVR Cameras Wireless?
NVR cameras can be both wired and wireless, depending on the type of system you purchase. Wireless NVR cameras connect to the NVR via Wi-Fi and do not require Ethernet cables, but they still need a power source. Wired NVR cameras use Ethernet cables (PoE – Power over Ethernet) for both power and video transmission, offering a more stable connection compared to wireless setups.